Visual Studio
Microsoft Visual Studio 2019
ทุก app มุ่งสู่ web app, mobile app ดังนั้น Visual Studio 2019 จึงเป็นเข็มทิศให้คุณถึงเป้าหมาย ไม่หลงทาง นอกจาก feature มากมายแล้ว Azure เป็นตัวเสริมหลักที่ช่วยให้การพัฒนาของคุณ และ app ที่เกิดจากฝีมือ มันสมองของคุณทำงานได้อย่างเสถียร รองรับจำนวน transaction ขึ้นลงแบบสุดเหวี่ยงได้ คุณสามารถ update app ของคุณให้เก่งขึ้นได้ตลอดเวลา ซึ่งหมายถึงว่า app ของคุณจะมีมูลค่าสูงขึ้น ทำรายได้ให้คุณได้สูงขึ้น
What’s new in Visual Studio 2019?
https://www.youtube.com/watch?v=n5sJ4EewKGk&autoplay=1
เรามาดูวิธีการทำงานแบบคร่าวๆ และหากคุณสนใจวิธีการทำงานทั้งหมด สามารถติดต่อเราได้เรามีเอกสารให้คุณ download 990 หน้า (เอง)
Create an ASP.NET Core web app in Azure
- Choose a hosting platform Linux / Windows
App Service on Linux provides a highly scalable, self-patching web hosting service using the Linux operating system. This quickstart shows how to create a .NET Core app on App Service on Linux. You create the app using the Azure CLI, and you use Git to deploy the .NET Core code to the app

· Use Azure Cloud Shell
Azure hosts Azure Cloud Shell, an interactive shell environment that you can use through your browser. You can use either Bash or PowerShell with Cloud Shell to work with Azure services. You can use the Cloud Shell preinstalled commands to run the code in this article without having to install anything on your local environment.
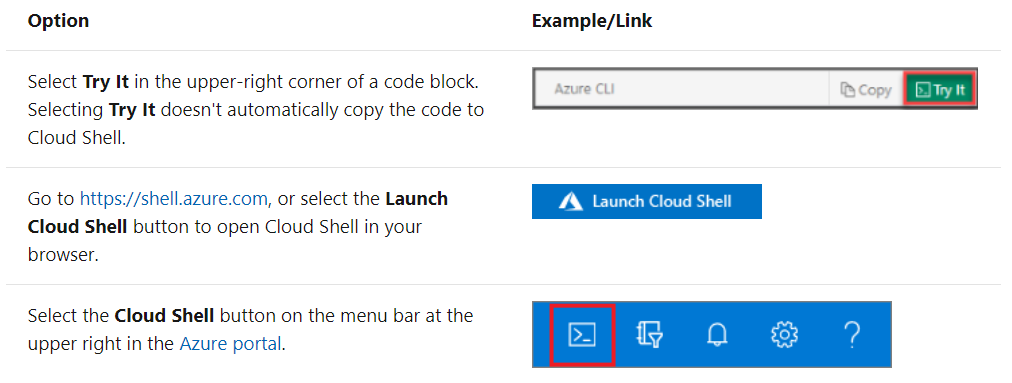
To start Azure Cloud Shell:
· Configure a deployment user
FTP and local Git can deploy to an Azure web app by using a deployment user. Once you configure your deployment user, you can use it for all your Azure deployments. Your account-level deployment username and password are different from your Azure subscription credentials.
To configure the deployment user, run the az webapp deployment user set command in Azure Cloud Shell. Replace <username> and <password> with a deployment user username and password.
- The username must be unique within Azure, and for local Git pushes, must not contain the ‘@’ symbol.
- The password must be at least eight characters long, with two of the following three elements: letters, numbers, and symbols.
· Create a resource group
A resource group is a logical container into which Azure resources like web apps, databases, and storage accounts are deployed and managed. For example, you can choose to delete the entire resource group in one simple step later.
In the Cloud Shell, create a resource group with the az group create command. The following example creates a resource group named myResourceGroup in the West Europe location. To see all supported locations for App Service on Linux in Basic tier, run the az appservice list-locations --sku B1 --linux-workers-enabled command.

You generally create your resource group and the resources in a region near you.
When the command finishes, a JSON output shows you the resource group properties.
· Create an Azure App Service plan
In the Cloud Shell, create an App Service plan in the resource group with the az appservice plan create command.
The following example creates an App Service plan named myAppServicePlan in the Free pricing tier (--sku F1) and in a Linux container (--is-linux).

· Create a web app
Create a web app in the myAppServicePlan App Service plan.
In the Cloud Shell, you can use the az webapp create command. In the following example, replace <app-name> with a globally unique app name (valid characters are a-z, 0-9, and -). The runtime is set to DOTNETCORE|3.1. To see all supported runtimes, run az webapp list-runtimes --linux.
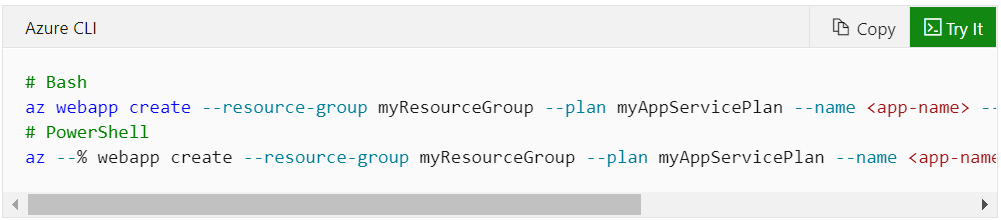
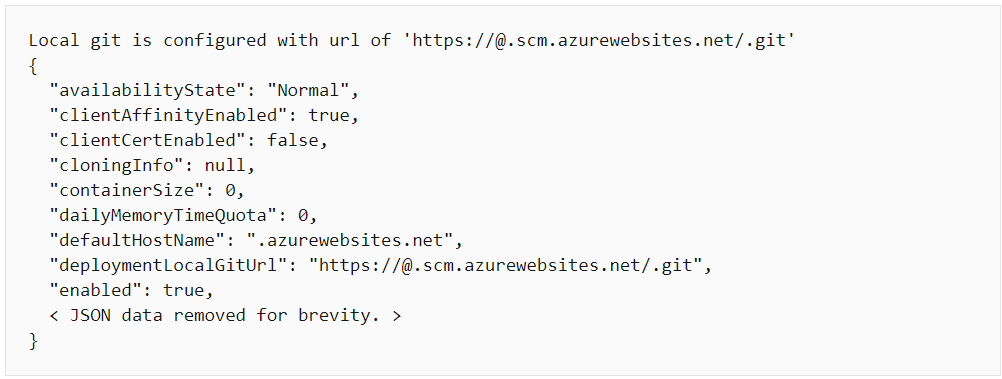
When the web app has been created, the Azure CLI shows output similar to the following example:
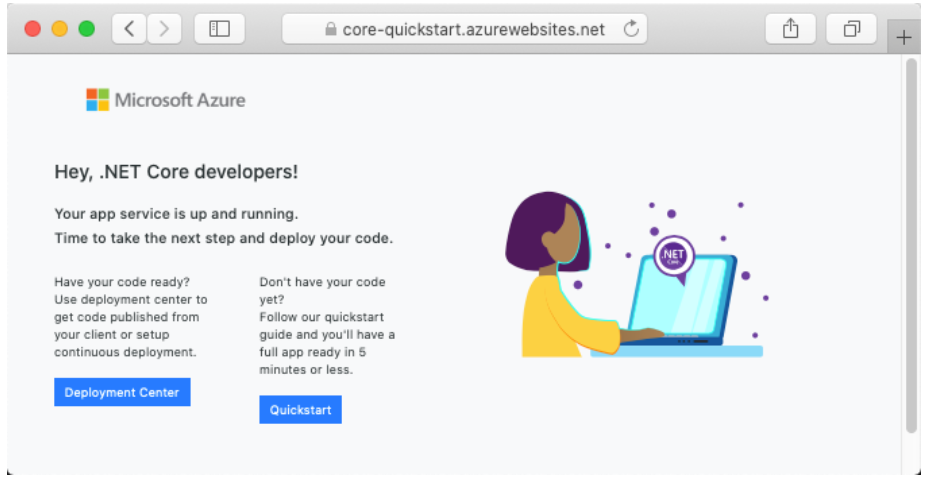
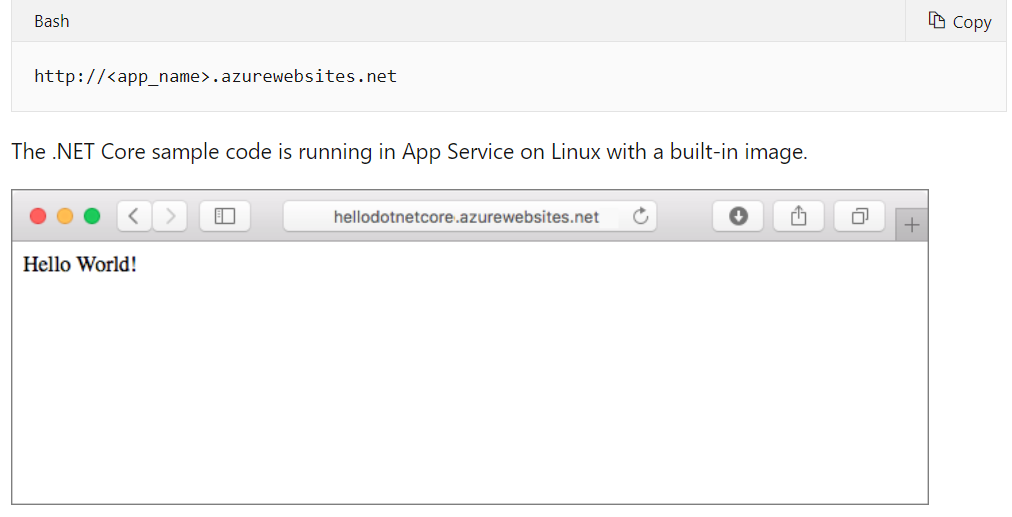
Here is what your new app should look like:
· Push to Azure from Git
Back in the local terminal window, add an Azure remote to your local Git repository. Replace <deploymentLocalGitUrl-from-create-step> with the URL of the Git remote that you saved from Create a web app.
· Browse to the app
Browse to the deployed application using your web browser.
Congratulations! You've deployed your first .NET Core app to App Service on Linux.
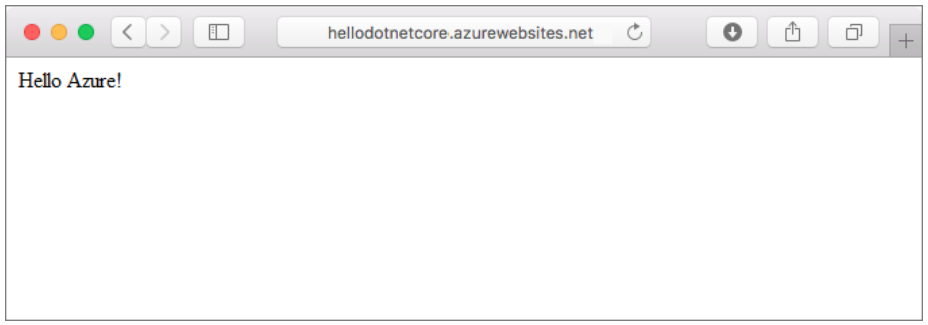
· Update and redeploy the code
In the local directory, open the Startup.cs file. Make a small change to the text in the method call context.Response.WriteAsync:
Once deployment has completed, switch back to the browser window that opened in the Browse to the app step, and hit refresh.
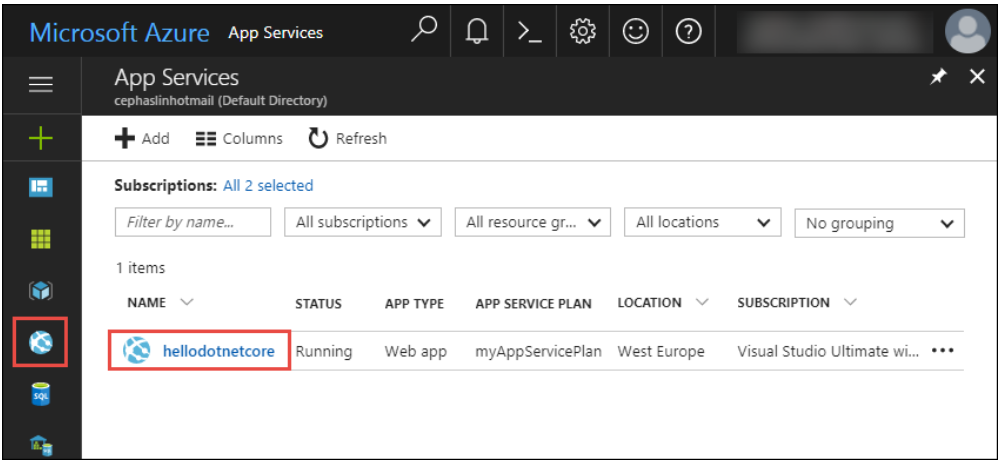
· Manage your new Azure app
Go to the Azure portal to manage the app you created.
From the left menu, click App Services, and then click the name of your Azure app.
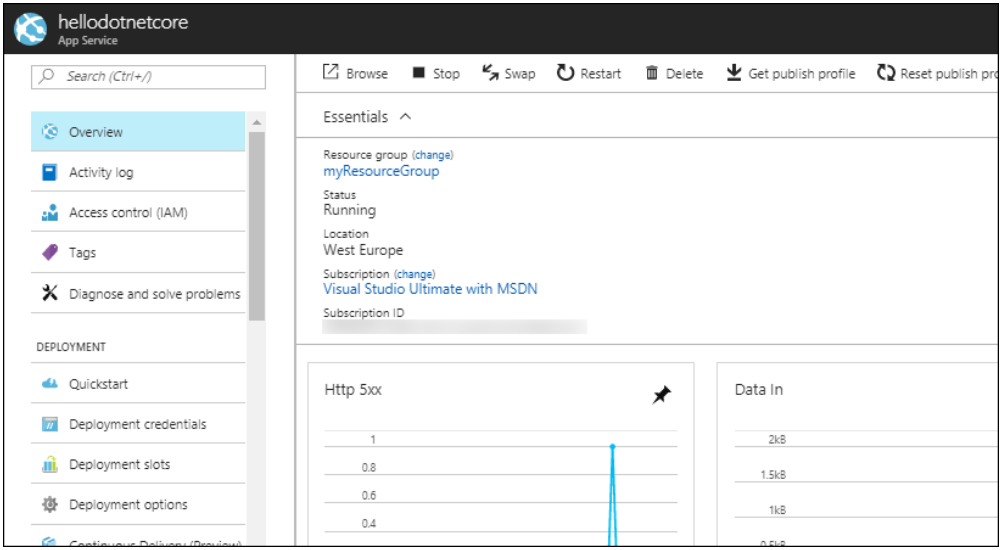
You see your app's Overview page. Here, you can perform basic management tasks like browse, stop, start, restart, and delete.
เรื่องราคาติดต่อเซลส์ marketing@bhatarapro.com เราจะขายเท่าที่คุณจำเป็นต้องใช้งาน


